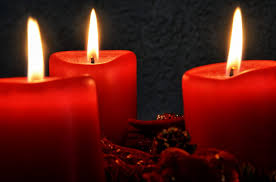
 Chunk candles add a great alternative to the standard pillar candle of yesterday. These colorful candles add a vibrancy and life to them. Looking at chunk candles, they appear to be very difficult to make. However, just the opposite is true. In fact, many candle makers claim they are easier to make than basic pillar candles. This is because pillar candles have to be perfectly smooth. If they aren’t, it is easy to see the visual defect. Such blemishes aren’t visible in chunk candles. While chunk candles aren’t recommended as a beginner project, they can be made once you know the basics of the candle making process.
There are two phases to making chunk candles. To make the process easier, it is recommended that you keep the two separate. Attempts to cut corners often result in chunk candles that are of poor quality and dont burn well. The first phase of the project is making the chunks. The second is the process of turning those chunks into gorgeous candles. Some individuals choose to purchase pre-cut chunks at craft stores or online.
To make your candles their prettiest, select colors that compliment each other. To start making the color chunks, spray a cookie sheet with a non-stick cooking spray. You only want a thin film on the cooking sheet. After the wax you are using has completely melted, add a color to it as well as any fragrance you want. Pour the mix onto the cookies sheet. Fill the sheet to the level you want the depth of your candle chunks to be.
Keep an eye on the cooling color chunks. Once it is the consistency of cookie dough you will want to use a sharp utility knife to cut it into chunks. Allow the chunks to continue cooling. If you are making several colors of chunks you can mix them together or leave them separate. Some people choose to let the colors mix together on their own while others like to create a design by adding the amount of each color they want.
Using the same molds that are used for pillar candles, insert your candle wick through the bottom of the candle mold. Fill the mold loosely with color chunks. You can put one color on the bottom with another color on top or even layers of three colors. You can also use only one color. The choice is all yours. Do not stack as many chunks as you can in the mold or the candle won’t form properly. Just toss them in and let them lay where they end up.
You are now ready to pour the melted wax over the color chunks. It is recommended that you do leave the melted wax colorless, but some people choose to add a light color to tint it and add a uniqueness to their chunk candles. As the candle cools, the chunks will adhere to together with the hot wax. Once the molds cool the chunk candles should slide out with ease.
Making chunk candles is really quite simple if you have the basic candle making concepts under your belt. These candles add flare to any décor as well as make great gifts. They are a bit more time consuming to make since you will be making your color chunks, but well worth the results. Remember that you can purchase color chunks to save you time. That is a great option for someone who plans to make large quantities of chunk candles.
For those who want to get even more creative, consider using embeds on the sides. You can place them in the candle molds first. They will stay in place once you put the chunks in the mold. You can adjust the embeds as needed prior to adding the hot wax to the mold. There are excellent books available on the various patterns and embeds you can add to make specific chunk candles. There are also great pictures and step by step instructions available on the internet.